
How to Create Your Own Successful Blog
If you want to create your own blog, it can seem like an overwhelming task.
Where do you even start?
This question alone probably holds back the majority of would-be bloggers… But it doesn’t have to.
Nearly any big project can be broken into smaller, more manageable steps. And that’s what we want to do here, so you can get started on your blog today.
This chapter will break down the core steps to creating your own blog.
Some of the steps that follow are intended for those who want to set up their own site without any additional support, which is relatively straightforward, using today’s user-friendly technology.
But outsourcing and getting a professional web designer to do the “tech” is also a great option if you can afford it.
Whichever approach you choose, the following steps will show you how to get a new blog up and running as quickly as possible.
Step 1: Determine Your Goals
Why do you want to create a blog?
Would you like a blog to generate a side income… or a full-time income?
Do you want a blog to help build your freelance business?
Or do you have personal reasons for starting a blog, like a desire to share your thoughts and experiences with others?
A blog is a long-term commitment, and you’ll need to be very clear on your reasons for starting a blog to stay motivated over the coming months and years as you build it.
It may help to write a short paragraph on your reasons why you want to start a blog. And keep this somewhere handy where you can refer to it if you ever start getting off track. Because you’re guaranteed to hit some complications as you develop your blog, and the more you understand why you’re doing it, the easier it will be to get unstuck.
Another helpful exercise is to write down what “success” would look like for you and your blog. How many hours per week would you want to put into your blog? What would the income from a blog allow you to do personally?
Consider the ideal picture of how your blog and your life could look a few years from now, and keep this in mind as your blog progresses.
Copywriter Heather Robson shares more tips on how to develop S.M.A.R.T. goals in her article here.
For more tips on how to stay motivated and keep moving forward on your goals, check out our free webinar on Creating a Winning Mindset for Your Writing Career.
Step 2: Find a Good Topic
In Chapter 1 on how to become a blogger, we looked at the importance of choosing your niche or specialty to focus on.
You likely have a few ideas in mind by now. If not, feel free to go back and review that chapter and consider your top areas of interest, and what you would most want to write about.
Once you know the general niche you want to focus on, it’s time to determine the exact topic for your blog.
Now, this can be easier said than done. But the following steps should help you choose a specific topic that’s perfect for your blog.
1. Determine Who You Want to Serve
What sort of person would be interested in your niche?
At first glance, this may seem like an obvious question. But the better you understand your potential readers, the better your blog will perform.
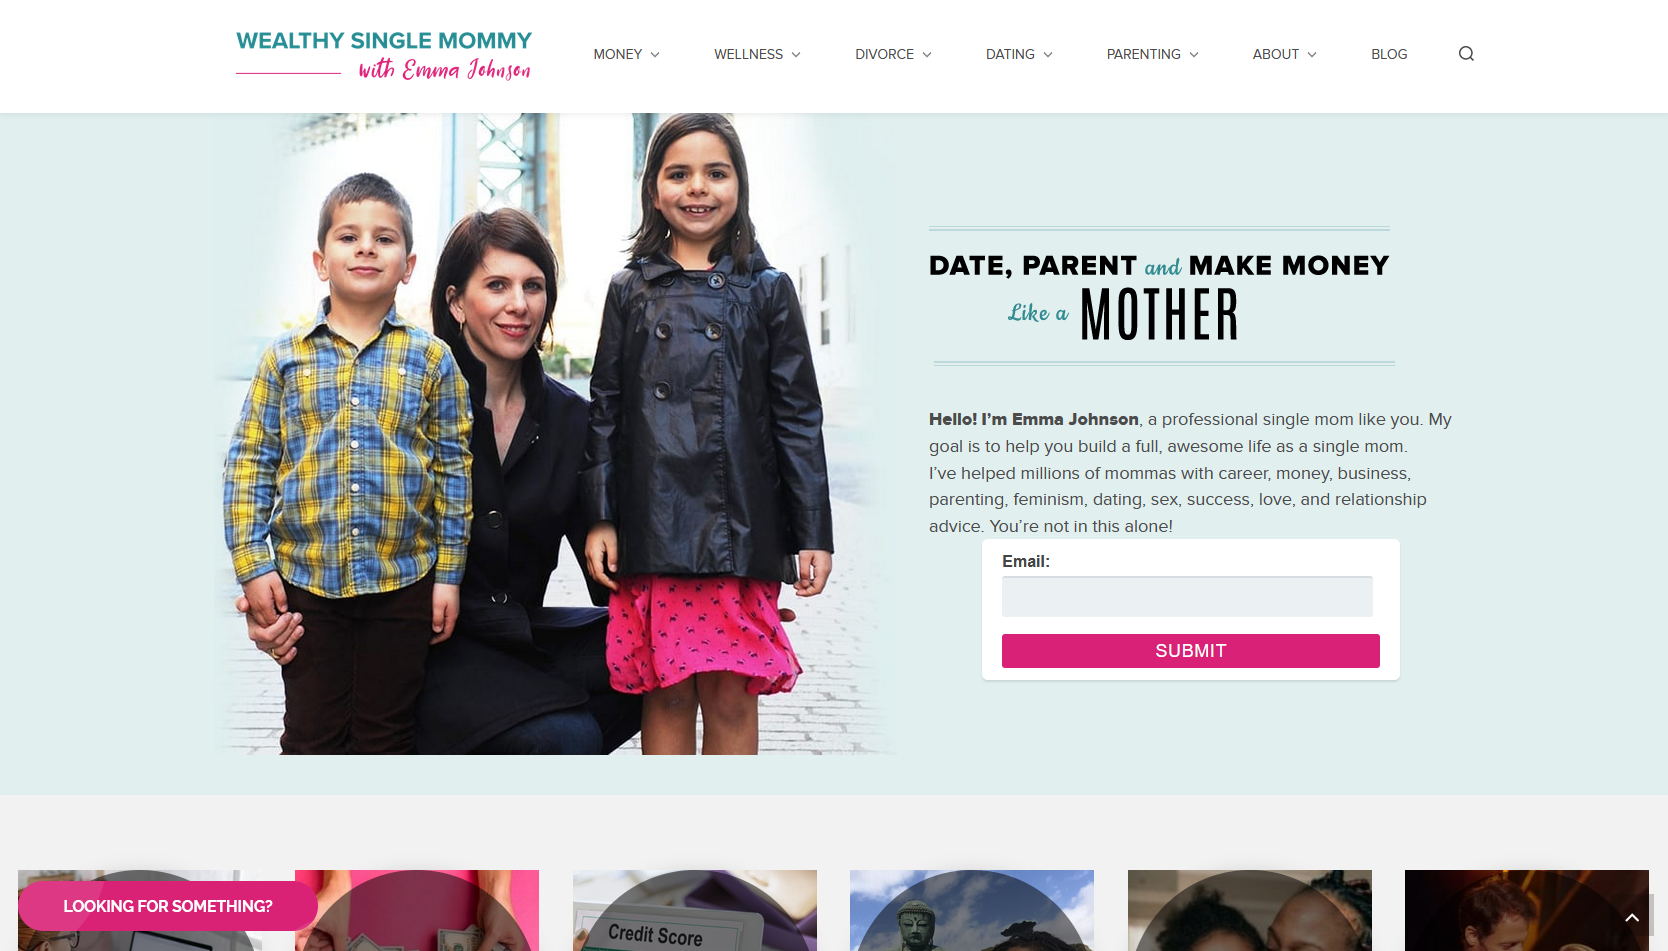
Emma Johnson took this question to heart when she designed her personal blog Wealthy Single Mommy.
‘I didn’t see a voice that was speaking to me, so I became that voice’ —Emma Johnson
When she started her blog in 2013, she was a single mother working as a freelance journalist, and she felt there were few resources online that really spoke to her.
So, she decided to start a blog to fill that gap. And she chose to focus on other women like her — single professional mothers.
Emma could have started a blog about parenting in general, or being a single mom. But those are both fairly broad audiences.
Instead, Emma narrowed in on exactly who she felt would benefit the most from the knowledge and skills she had to share. And for her, that was professional single mothers.
Wealthy Single Mommy began attracting readers from the start because Emma knew her audience and could blog about what mattered to them.
In 2015, Wealthy Single Mommy had become successful enough that she was able to walk away from her journalism career and focus solely on her blog. And between 2015 and today, her income has doubled every year.
A big reason behind her success is that she made a clear decision on who she wanted to serve.
For you, the decision may be similar to Emma’s. Perhaps you’re already part of an audience that your blog could reach. You may have a hobby, life experience, profession, or other knowledge that you can easily share with others.
This will make getting to know your audience easier because you’re addressing people similar to yourself.
But even if you want to blog about something you’ve never had any experience with, you can start to develop a clear picture of who you can best serve with a few basic questions:
- Are there any obvious demographics that would apply to your audience? For example, a blog about beard care would primarily have a male audience.
- Does your audience have any specific beliefs or values you should take into account?
- Do they belong to any particular group or association?
- What motivates them to take action?
- What do they find fun and entertaining?
- What problems are they trying to solve?
- How can you help them solve those problems, or improve their lives for the better?
Even if you’re a freelance writer trying to decide who you should target for your writing business, answering these questions should give you a good idea of the most appropriate audience for your blog and your business.
2. Research Your Potential Audience
Once you have your audience narrowed down, it’s time to find out where they are and what they’re looking for.
Start by reading what your audience is likely to read, including printed materials like books and magazines, as well as online sources like news sites, social media, or other blogs.
Subscribe to the email list for some of the websites and read what they send you.
Join related groups on social media and pay attention to the conversations people are having.
Go to online or in-person conferences or workshops if possible.
What topics seem to come up repeatedly in all of these sources? Do you see any patterns?
You should be able to get a sense of what resonates with your potential audience and the type of information that’s important to them.
This knowledge will be vital as you develop the content for your blog.
3. Figure Out What Makes Your Voice Unique
As you research what’s already available in your niche, keep your intended audience in mind.
What makes you stand out from other websites and publications in your field?
What do you have to offer that’s unique?
Like Emma Johnson, you might see that no one is actually speaking to the exact audience you have in mind. And there may be a clear gap you can fill as a blogger.
But even if your blog topic is very similar to others, your individual voice will always be different from your competition’s.
Your experiences and how you view the topic will be unique to you, so don’t try to blend in with everyone else. Make sure you let yourself shine through in your writing.
4. Put It All Together and Choose a Topic
After you’ve gotten a good picture of who you want to serve, what types of information they’re looking for, and what you have to offer, you’re ready to make the final decision on the topic of your personal or freelance blog.
You may want to go through these steps for more than one topic, because some subjects will naturally have larger audiences than others. Pay close attention to how much information is already available on your topic in social media groups, existing websites, or other sources.
If there’s already a lot published on it, this is usually a good thing. It means that topic is in high demand and there’s a big audience for it. If this is the case, try to find a unique aspect to that topic to make your blog stand out.
If you’re not finding much information on your topic, it could mean a couple of different things. It’s possible no one is really searching for that topic and your potential audience is fairly small. Or it could reveal a gap in the market that no one else has filled yet, as Emma Johnson found with her blog.
In the end, your final choice should also be a topic you find interesting enough to write about for years to come. That way, regardless of any ups and downs as you develop your blog, you’ll still have the motivation to keep trying different things and refining your topic as you go.
Discover 347+ Lucrative Blogging Ideas to Start Your Journey as an In-Demand Blog Writer
Sign up to receive 347+ Lucrative Blogging Ideas instantly.
Step 3: Find a Good Site and Domain Name
The domain name for your site is essentially your address on the web. It’s displayed at the top of your internet browser as shown below:

Choosing the domain name for your website is a big decision. But at the same time, don’t let it hold up your progress.
With some basic brainstorming and research, you should be able to come up with a good name fairly quickly.
Typically, your domain name and the name of your business or website will be the same. But they can be different if, for instance, you already have a specific business name you want to keep and the matching domain name is unavailable. In this case, you can use a domain that’s close to your business name.
But if you’re starting from scratch, we recommend choosing a domain name that’s the same as your blog or business name.
Ideally, the name of your site should explain what your blog or freelance business is about in some way, and make it clear who your target audience is.
Here are a few good examples of this approach:
- SmartBlogger.com
- PlantCareToday.com
- TeachChildrenMeditation.com
- TheJoyOfCats.com
- MoneySavingExpert.com
- MuscleAndFitness.com
- GlutenFreeOnAShoestring.com
Each of these domain names make the topic of the blog clear, and anyone seeing those names would instantly know whether that blog is for them.
Avoid using a name just because it sounds clever or funny. This can make the topic of your blog unclear, and if a potential reader is confused in any way when they see your blog’s name, they may leave and keep searching elsewhere.
Another option is to simply use your name, such as DeepakChopra.com. Many freelance writers use this option, but it can also be appropriate for a personal blog.
Domain names all have an extension at the end, the most common being .com, .net, and .org. We recommend using one of these three extensions for your domain simply because people are familiar with them.
Using a .com address is ideal, but these can sometimes be expensive, depending on how popular a domain is. If you really can’t find a .com domain name, consider a .net or .org as a second choice.
Brainstorm some possible names for your website and write them down before you move on to the next section.
Step 4: Register Your Domain
Have you got your list of potential domain names ready?
Great. It’s time to see if they’re available to register.
You can do this by going to any domain registry site, such as GoDaddy, BlueHost, or NameCheap, and searching for the domain you created.
The site will tell you whether that domain is available to purchase, and how much it would cost to register it with that site.
Domain name registration is simply the process of reserving a domain name on the internet for a certain period. Registration is necessary for a website, and you can “own” that name as long as you renew your registration each year, which is easily set up with your registrar.
Every domain registry site is a bit different, so shop around and see which one best meets your needs.
These are some questions you can consider when deciding which registry service to use:
- What’s the cost to register?
- What is the duration your site stays registered?
- What are the transfer terms if you move your domain to a different registrar?
- Is there a set-up fee?
- What are the terms of service?
- What do existing customers say about the company?
If you have any questions along the way, don’t hesitate to reach out to a domain registry site.
Keep in mind that you do not have to be a web programmer or know all the “tech” behind creating a website to do this. Registry sites are usually more than happy to help guide you through all the technicalities as you register your site.
Step 5: Choose Your Website Platform and Hosting
Once you have your domain registered, it’s time to set up your site. You can do this in a couple of different ways, which we’ll explain here.
1. Find Web Hosting and Build Your Site with WordPress
This is the more complicated option, but it also allows much more flexibility for your site.
Particularly as your site grows, you may want to start including more complex elements, such as adding a shopping cart, building an online course, or other features.
Finding your own web hosting service and creating a website using WordPress will allow complete control over your own website. This is a big reason why 62 percent of the top 100 fastest-growing companies in the United States use WordPress.
The first step is to find a web hosting service, which is a service that allows you to post a website on the internet.
The three domain registry sites we mentioned above (GoDaddy, BlueHost, and NameCheap) also offer hosting services. But many other hosting sites exist as well, both large and small, so do your research before deciding which one to use.
They all offer a variety of plans and pricing. Try comparing some of the following items for each host as you make your decision:
- average uptime
- customer support
- variety of plans
- storage space
- security
- email plans
- customer reviews
And similar to the domain registry sites, you can always contact the individual companies to ask questions and get help with the process.
Once you’ve signed up with a web hosting service, the next step is to set up WordPress.
WordPress is free software that you can install with your web host in order to create a website.
It’s completely open-source, and there are many websites and other resources online that detail exactly how to install and use WordPress.
This is an extra step that involves a learning curve, but it can be well worth it in the long run. You can either learn WordPress on your own or hire a web designer to help if you can afford it. Your hosting company can also help guide you through the process.
WordPress also has what are called plug-ins that you can install. These are simply additional pieces of software that have unique functions you can add to WordPress.
As you set up your site, these are some plug-ins you’ll likely want to include:
- SEO
- Security
- Forms
- Comments
- Backups
- Editorial calendar
Remember that finding hosting and setting up your website using WordPress is fairly straightforward as long as you take it step-by-step.
But if the technical side of the process really puts you off, another option is to use an online website builder, as we discuss next.
2. Online Website Builders
An online website builder is a web hosting service that also provides built-in software you can use to create your website, instead of using WordPress.
Some common website builders are Wix, SquareSpace, and SiteBuilder. But, similar to web hosting companies, there are many online website builders. So take your time and shop around before deciding which company to use.
Each website builder offers different features, such as formatting templates or the ability to add a shopping cart to your site. They are also less technical to use than WordPress. With an online website builder, typically everything is provided on the site, so it makes creating your own website fairly quick and easy.
But website builders can also be limiting, because you have to work within what the site offers. If your plan is to build a fairly straightforward blog or freelance site without many unique features, using a website builder may be the best choice.
Whereas, if you’d like to potentially add more complex elements to your blog in the future, using a web hosting service and WordPress is likely your better choice.
Step 6: Publish Great Content
Needless to say, your individual blog posts will be the most essential part of your blog.
The quality of your posts will determine the success or failure of your site, so it’s important to take this into account from the start.
We’ll discuss exactly how to write a blog post in Chapter 4, but you can start planning your approach even before you start writing.
How often will you publish new posts on your blog?
Some blogs publish one or more new posts every day — although these are often large sites that have professional blog writers working for them.
If this is unrealistic for you, consider what publishing schedule you could actually meet. It may be publishing a new post once a week, or once a month. But keep in mind that the more often you publish new posts, the more reason your readers will have to visit your site.
It’s helpful to set up a publishing schedule for your blog to keep you on track. You can take note of the blog post topic for each post and when it will be published. This will also give you clear deadlines, which can act as a good motivator.
You can also consider how long your blog posts will be. In general, longer and more in-depth blog posts tend to get more search engine traffic than shorter, less detailed posts.
So, it’s not an effective strategy to write a lot of short, low-quality blog posts just to be able to publish more frequently.
Instead, focus on writing high-quality, well-researched posts that provide value to your audience. If you write quality posts like these, your search engine rankings will still typically be much better, even if you publish less frequently.
Step 7: Launch!
Once you have your site set up and some quality content ready, it’s time to publish!
How many pages do you need before you officially publish your site?
As a general rule of thumb, if you have about 10 or 20 good pages on your site, it’s time to launch. This includes your home page and any other main pages you want to build, such as an about page or contact page, as well as some initial blog posts.
You want your blog to have enough content for a visitor to have a good experience if they visit your site. But you don’t have to wait until everything is “perfect” before you launch.
Your blog will change and grow as you progress, which is a completely natural part of developing a blog. So the most important part of starting your blog is to simply get it out there.
Consider setting up a profile for your site on social media sites. It’s likely best not to overload yourself at first, so try starting with some of the big sites like Facebook or Twitter first, then moving on to other sites as time permits.
If your topic lends itself well to photos, try setting up an Instagram account. Or if you like doing videos, you can start a YouTube channel.
Another option to get your blog noticed is to guest blog on other sites in your niche. Research some sites you think might be a good fit and see if they have any details on the site about guest blogs. If they don’t, contact the site and ask if this is something they would be interested in.
Guest blog posts can also be a good way to build external links, where other websites include a link to your blog. This also helps your site rank better with search engines.
For additional tips on building and launching your website, check out web writing expert Nick Usborne’s How to Write Your Own Money-Making Websites course. He takes you step-by-step through the process of creating a successful blog or other information-based website from scratch.
Chapter Summary
No doubt, creating your own blog is a big undertaking. But it can be simplified by breaking it into bite-sized tasks.
You need to be clear on what your goals are for your blog and what you hope to achieve with it.
You need to know who your potential readers are and what your blog can offer them.
You also need to figure out some technical details for your blog, such as choosing a domain name, finding hosting, and setting up a publishing schedule.
And lastly, you’ll need to launch your site and start getting the word out.
The good news is, you’ll need to go through these steps only once as you create your blog.
The next step is to regularly publish fresh content. And in Chapter 3 of this guide, we’ll delve into how to find an endless supply of new ideas for your blog posts to keep your publishing schedule full.
“Make Money Blogging” Program

EVERYTHING you need to make great money writing blogs is included…
- How to write blogs people actually want to read…
- What to write about…
- How to connect with the countless businesses that desperately need writers like you to keep their blogs relevant and current…
- How to make money writing your own blog…
It’s… all… in… the… program!
What’s Inside This Beginner’s Guide to Blogging?
Introduction Welcome
How to Make Money Blogging
Chapter 01
How to Become a Professional Blogger
Chapter 02
How to Create Your Own Successful Blog
Chapter 03
How to Have an Endless Supply of Blog Post Ideas
Chapter 04
7 Tips for Writing a Blog Post Your Reader Can’t Put Down
Chapter 05
How Do Blogs Make Money? The Question All Successful Bloggers Need to Understand